So, I said I had more stories, and here’s another one.
While I was in Navajo Nation, I got a chance to listen to a young man talk about his pottery. I won’t even begin to do this story justice, but basically he lives in an area that was once inhabited by the Anasazi people, and he can walk around his house and around the rock formations and find old pieces of broken pottery, formed and painted so long ago. And it inspired him to start making his own, based partially on what he finds and partially on a modern twist to their forms and designs.
I thought that was one of the coolest things I had ever heard! He had some pieces he showed us, and told us about how he makes and fires the pottery, and how he creates the dyes, and all of it how it was done for centuries.
His story then inspired me to do something like that! I can walk around my house and pick up stones, and then just like *my* ancestors did, I started making stone carvings! Ok, so I cheat a bit and use a dremel instead of arduous hand carving with manual tools, but still, I’m loving this so much!
My sister got the first one. She asked if I could do a scrolly design in green. I said yes to the scrolly, but said there was no way I could color it that it would last, I only have water-based paints and they’d wash off too easily. But I got a nice pendant-shaped stone and started carving away.
Then… as I sat at my computer desk… out of the corner of my eye… what should I see?? But green nail polish! Yes! That’s it, enamel, that won’t wash off at all! And if it’s tucked into the groove of the carving, it won’t chip off, either! So my sister got her green scrolly design in the end! 🙂

stone pendants
That, along with the other two, were the first ones I tried. I was using a diamond tipped bit, so it would drill through the stone, and had to keep the stone constantly wet to prevent stone dust from getting into the motor and to keep the stone and bit cool. (also, wear a dust mask! The stuff in rock can be super-duper awful to get in your lungs! As awful as that dust mask smells, it’s preferable to the alternative!)
Well, after having such success with that, I decided to try others, drilling lots of little stones into tiny bead-kinda things, I don’t have pictures of those yet – coming soon. But then I was telling a gal at work about it and ended up making three more just tonight when I got home, two for ladies at work and one for me. One of the gals collects heart-shaped stones, so I carved a heart onto hers so she could have a “heart stone” with her always!
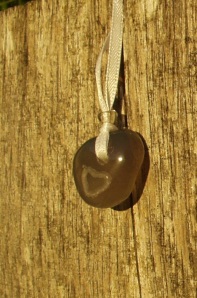
Heart-stone pendant
The other gal gets this fabulous red stone pendant:
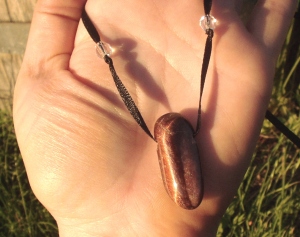
Red stone with crystal beads
And I carved my Norse SCA name into this and then added gold nail polish to the letters to make them sparkle (you can’t see it very well in this picture but it’s there. Trust me.)
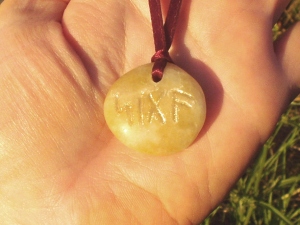
“Sigga” stone pendant
So this is my new hobby to add to the growing collection. Stone carving. Soon I’ll work my way up to larger stones and larger images (beyond pendants) like the Norse did all over the bloody place.
I also painted a cavern scene. I can’t really blame this on anything except maybe an abundance of rocks on the brain 😉

Sub-landscape ©2014 Eliza Murdock
(that’s supposed to be an underground lake… and yes, that may just possibly have been meant to be a city down there. >.> )
Oh, and almost forgot, in celebration of the whole Norse thing going on, I’ll add a third poem to the prompt I posted in my last entry for every word starting with the same letter of the alphabet.
Vaginal Vacancy
Vikings verberate violently,
Verily! Valkyrie voices vie!
Vivid vigils viewed: vigorous, volatile.
Vanity vanishes, victory verges.
Voracious vyings, vaginal vacancies
Voluptuous vexations visit.
Valour, virtue vomited.
Vague vapors vent vitality
Vibrating veins, vindicating validating
Visceral vignettes vicariously.
Vikings verberate violently,
Verily! Valkyrie voices vie!
Violet vineries ventured,
Vast vats voiding vows.
Vibrant vert vale vistas
Vast vassaled vaults.
Vilified voyeuristic visits
Via vestal virgin, vandaling vulvas.
Veiled velvet vortecies
Violated viciously, vilely.
Vikings verberate violently,
Verily! Valkyrie voices vie!

 Yep, it’s an octo-mermaid! Or… something. I don’t even know what inspired me, I just got the sudden urge to make an octopus-mermaid hybrid and… did! 😀 Made the ‘necklace’ with shells and beads strung onto wire.
 Spun the hair, almost didn’t have enough. That’s all the gold wool I had on hand, but I’m really happy with how the style turned out!
 See, all 8 legs are there, honest. 😉